FabFTDI
Fab FTDI (CH340g)
- CH340g-based Fab FTDI
- tested up to:
- 2 Mbps on loopback
- 250000 bps with esp8266
- RTS/CTS flow control
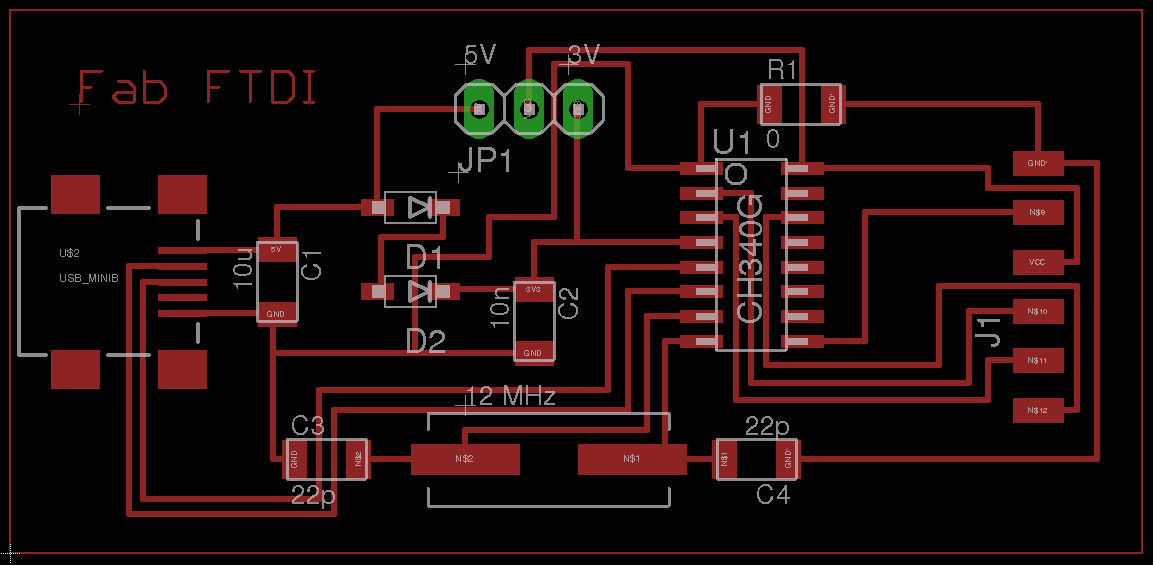
Schematic & Board Layout
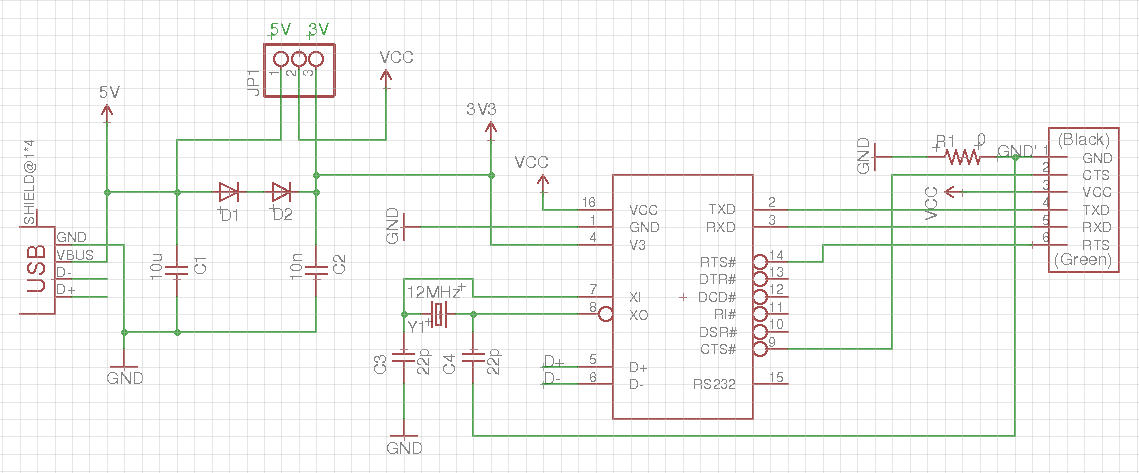
JP1 allows selection of 5V or 3.6V supply for FTDI interface
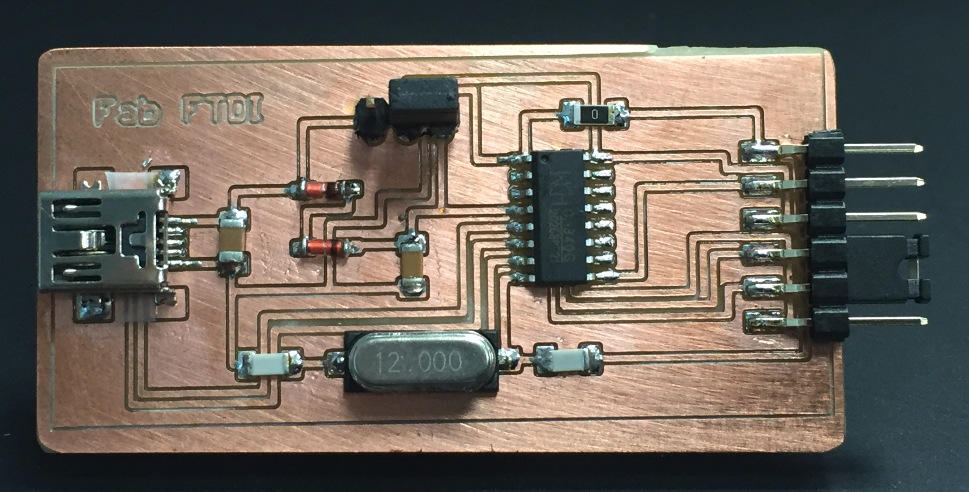
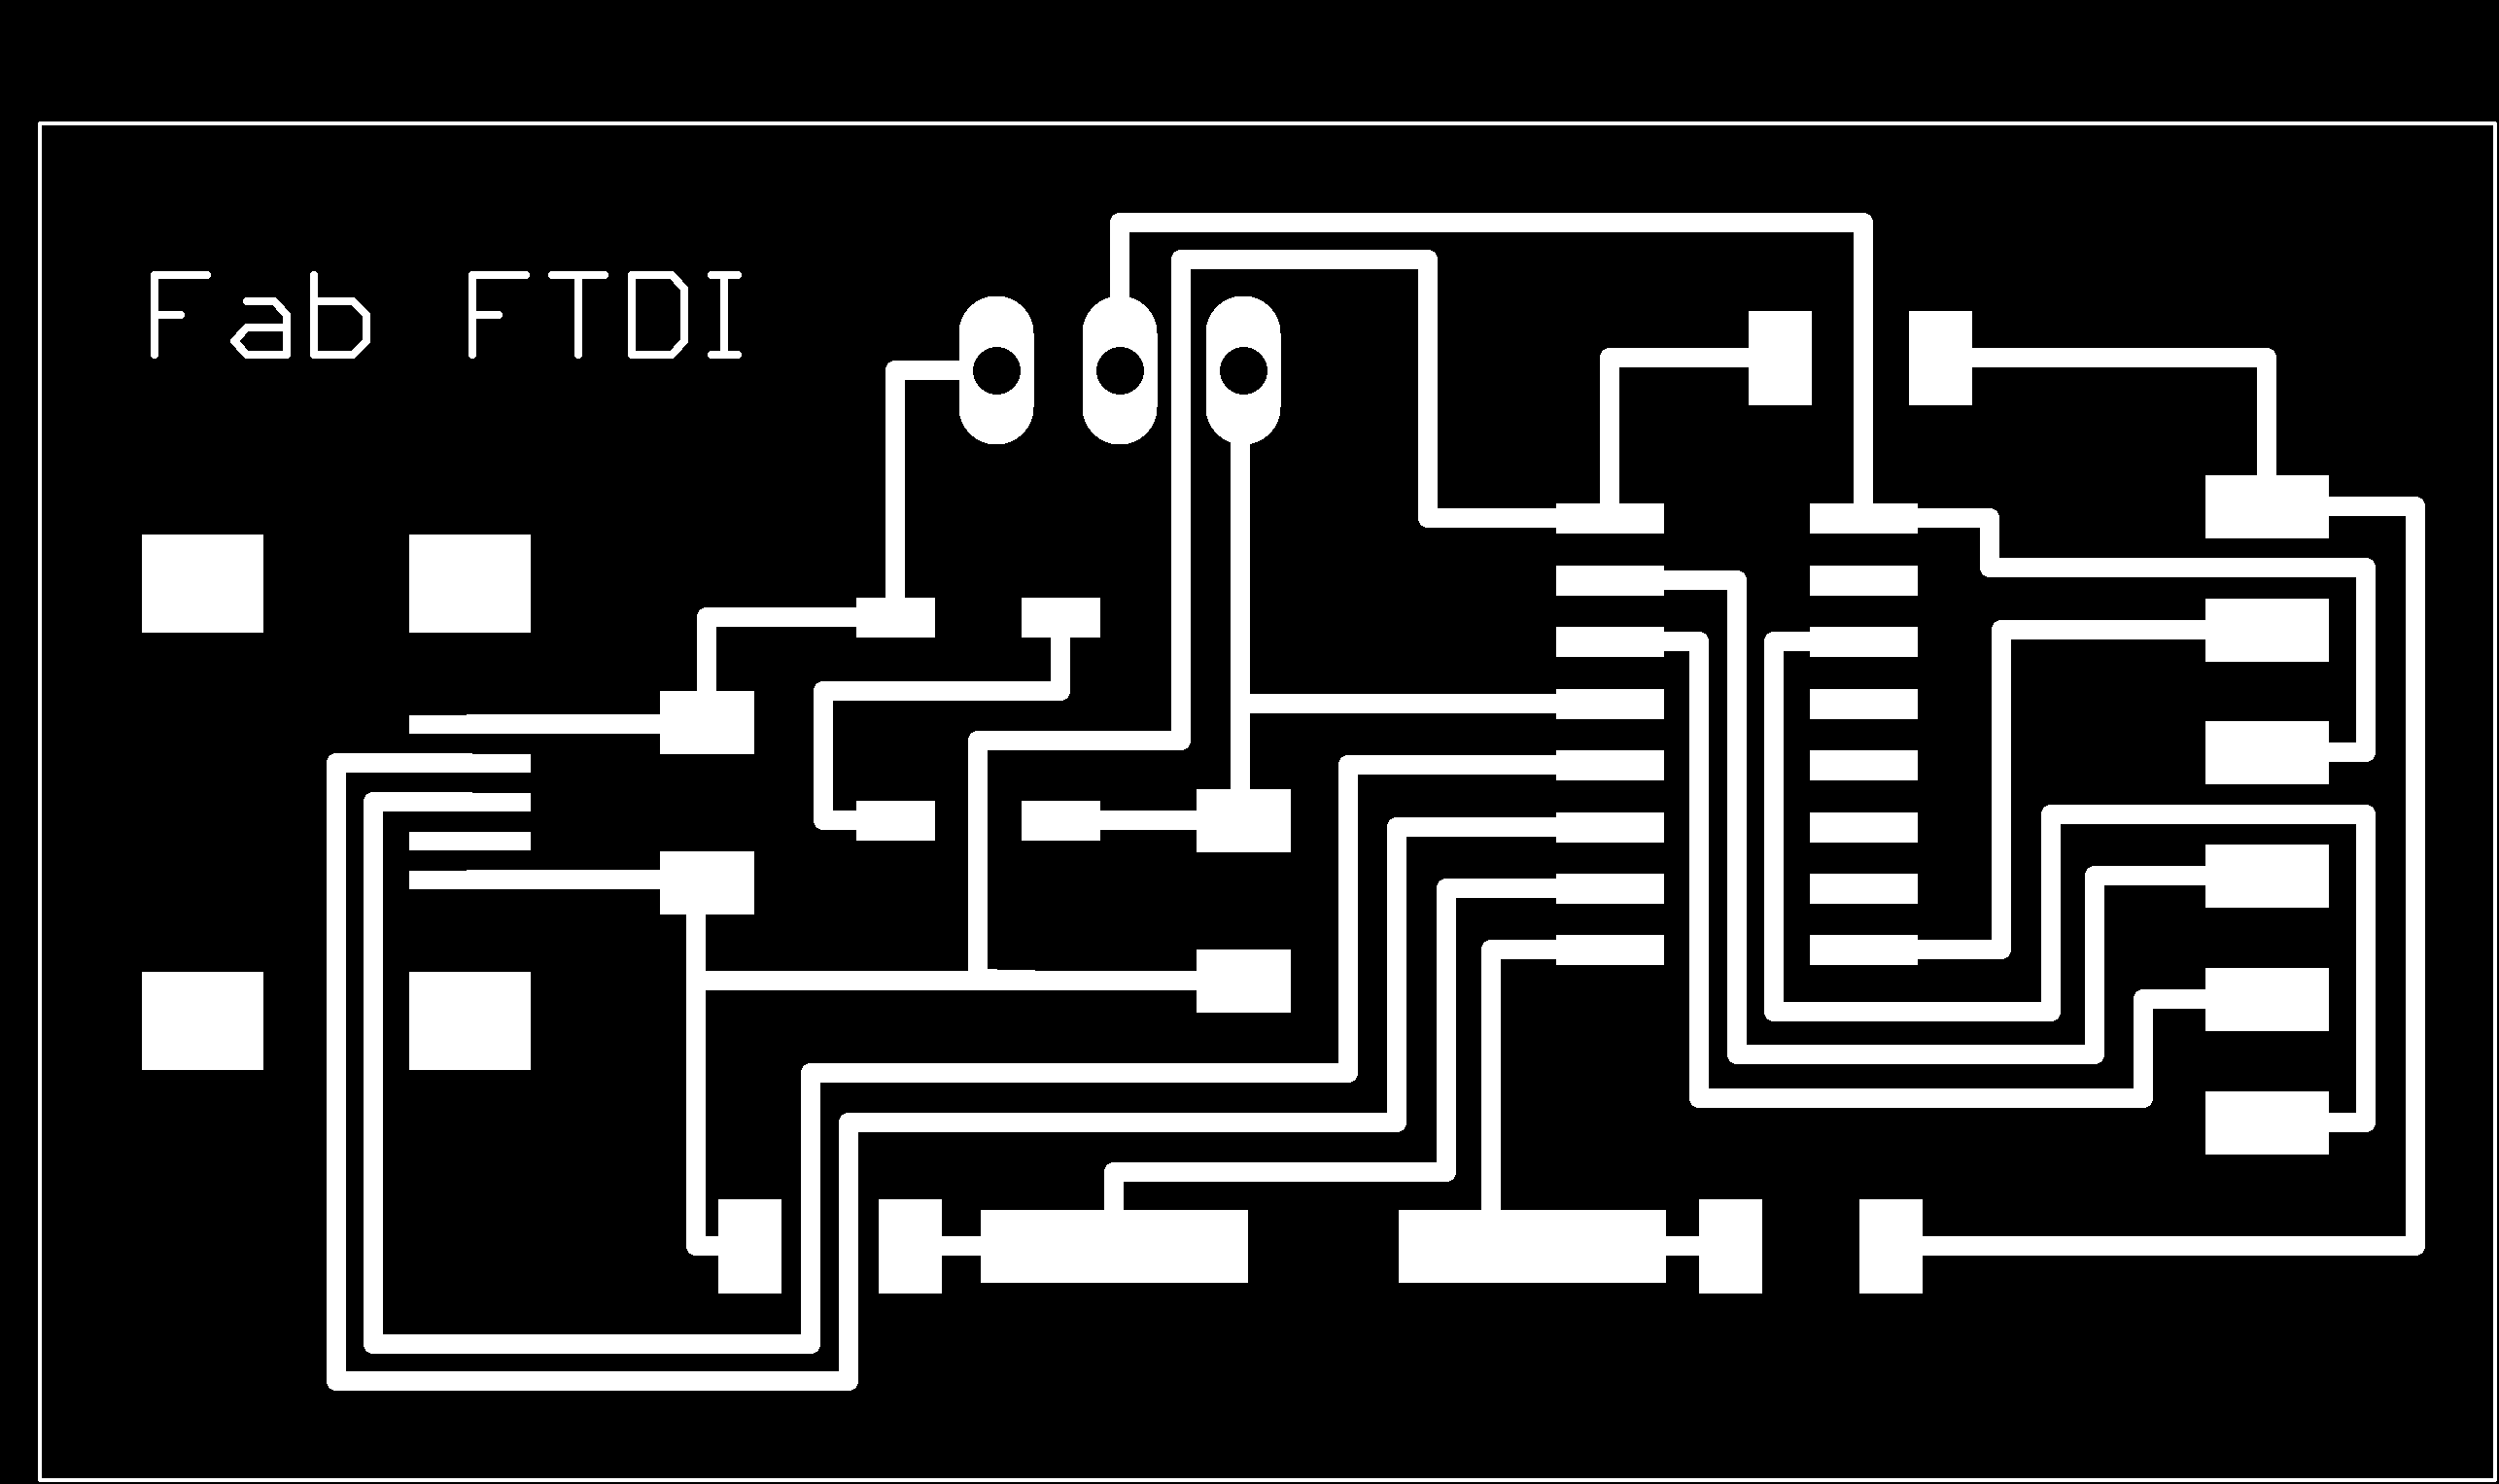
Mill and stuff the PCB.
Fab Modules downloads (1269dpi):
Component List
| Component | Component | | :——– | :——– | | 1 x CH340G | 1 x Mini-USB | | 1 x 10uF capacitor | 1 x PinHD 1x3| | 1 x 10nF capacitor | 1 x PinHD 1x6| | 2 x 22pF capacitor | 2 x Diodes 1N4148 | | 1 x 12MHz crystal | 1 x 0 ohm R |
Testing the Board
Plug the FabFTDI-CH340g board into your computer’s USB port. On a Windows machine, look for the COMport under Control Panel > System > Device Manager. You may need to install the CH340g driver. A signed driver can be downloaded here –> CH340g driver. If you need help in installing the CH340g driver, you can refer to this article.
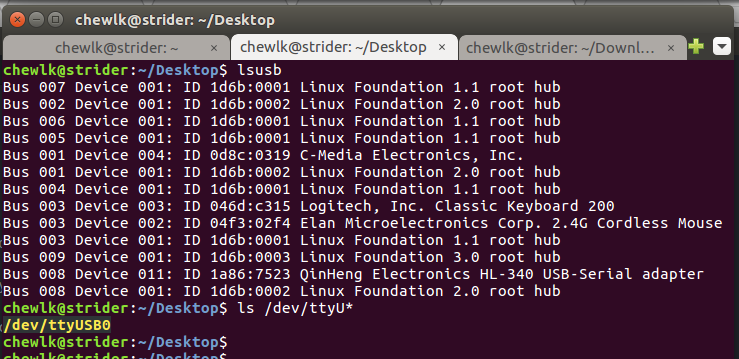
Linux PCs and MacBooks should be able to detect the FabFTDI board without any driver. To check the device port:
lsusb
should display QinHeng Electronics HL-340 USB-Serial adapter
ls /dev/ttyU*
should display the device port.
To perform loopback test on the board, jumper the TXD and RXD pins. Open your favorite terminal emulation software, e.g. Arduino IDE or picocom. Select the device port.
E.g. for Arduino IDE on Linux, select Tools > Port > /dev/ttyUSB0. Click Serial Monitor (Ctrl+Shift+M). Select Both NL & CR. Select the desired baud rate. Type a message on the transmit window and press Enter or click the Send button. You should see the message appearing on the received data window.
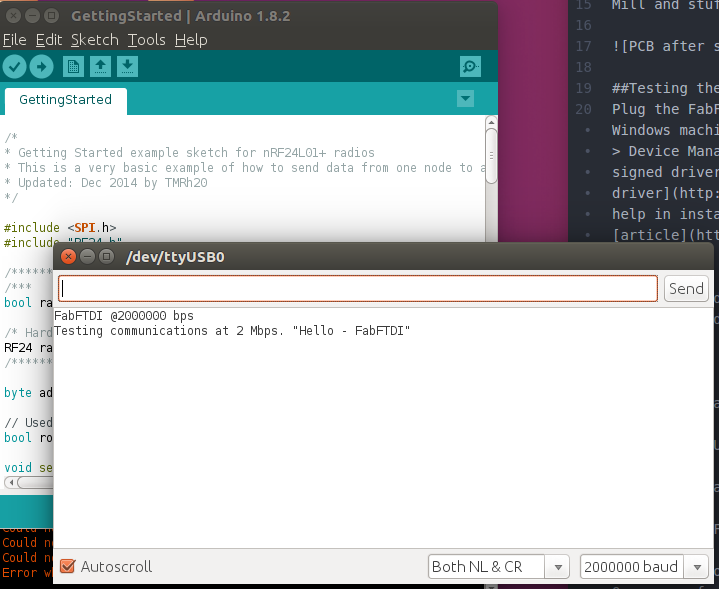
As stated at the start of this tutorial, I have tested the board up to 2 Mbps on loopback and 115200 bps on an ESP8266 module.
Good luck and have fun with your FabFTDI board!
Files
Copyright (c) 2017-Steven Chew
MIT license