FabPDI-mega8
The FabPDI-mega8 programmer is based on a modified USBasp for PDI programming. The main features of this board are:
- modified USBasp
- based on ATmega8
- uses the V-USB library
- operates as both PDI & ISP programmer
You could use an ATmega88, ATmega168 or ATmega328 instead of the ATmega8, but will need to re-compile the firmware for the new microcontroller from source.
There are 3 parts to building the FabPDI-mega8 programmer:
- Building a PDI programming cable
- Building the FabPDI-mega8 board and uploading the modified USBasp firmware to it
- Compiling a modified version of avrdude that recognizes the FabPDI-mega8 as a PDI programmer
My main references in building the FabPDI-mega8 programmer were articles from:
and I am indebted to these authors for the information that I gleaned from their sites.
Building a PDI Programming cable
A regular USBasp uses a 5V supply. The ATxmega series ICs operate at 3.3V, including the data pins. There are a few ways to resolve this problem:
- Use a separate 3.3V power supply and zener diodes to limit the voltages to 3.3V
- Ensure that our FabPDI-mega8 can switch completely (including data pins) between 5V and 3.3V operation
2 versions of the PDI programming cable can be fabricated, depending on which of the 2 approaches above is used.
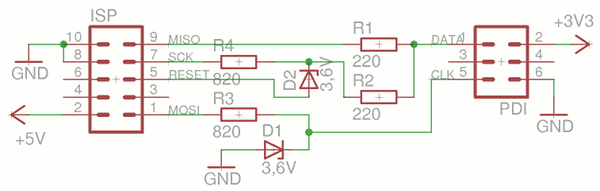
PDI programming cable for a 5V board
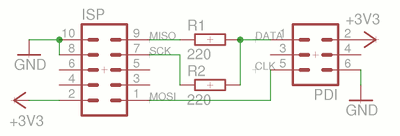
PDI programming cable for a 3.3V board
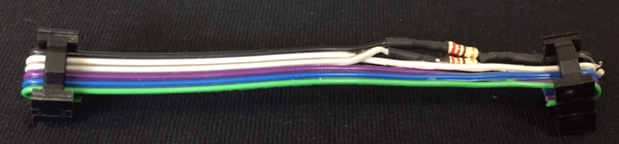
For my FabPDI-mega8 board, I modified the original USBasp design such that the board can switch completely between a 5V supply and a 3.3V supply. I kept the cable short to minimize issues with noise and timing disruptions to the PDI protocol and spliced the 220 ohm resistors directly into the ribbon cable.
A regular 6-way cable is used for ISP programming.
Building the FabPDI-mega8 Board
Schematic Diagram and PCB Layout
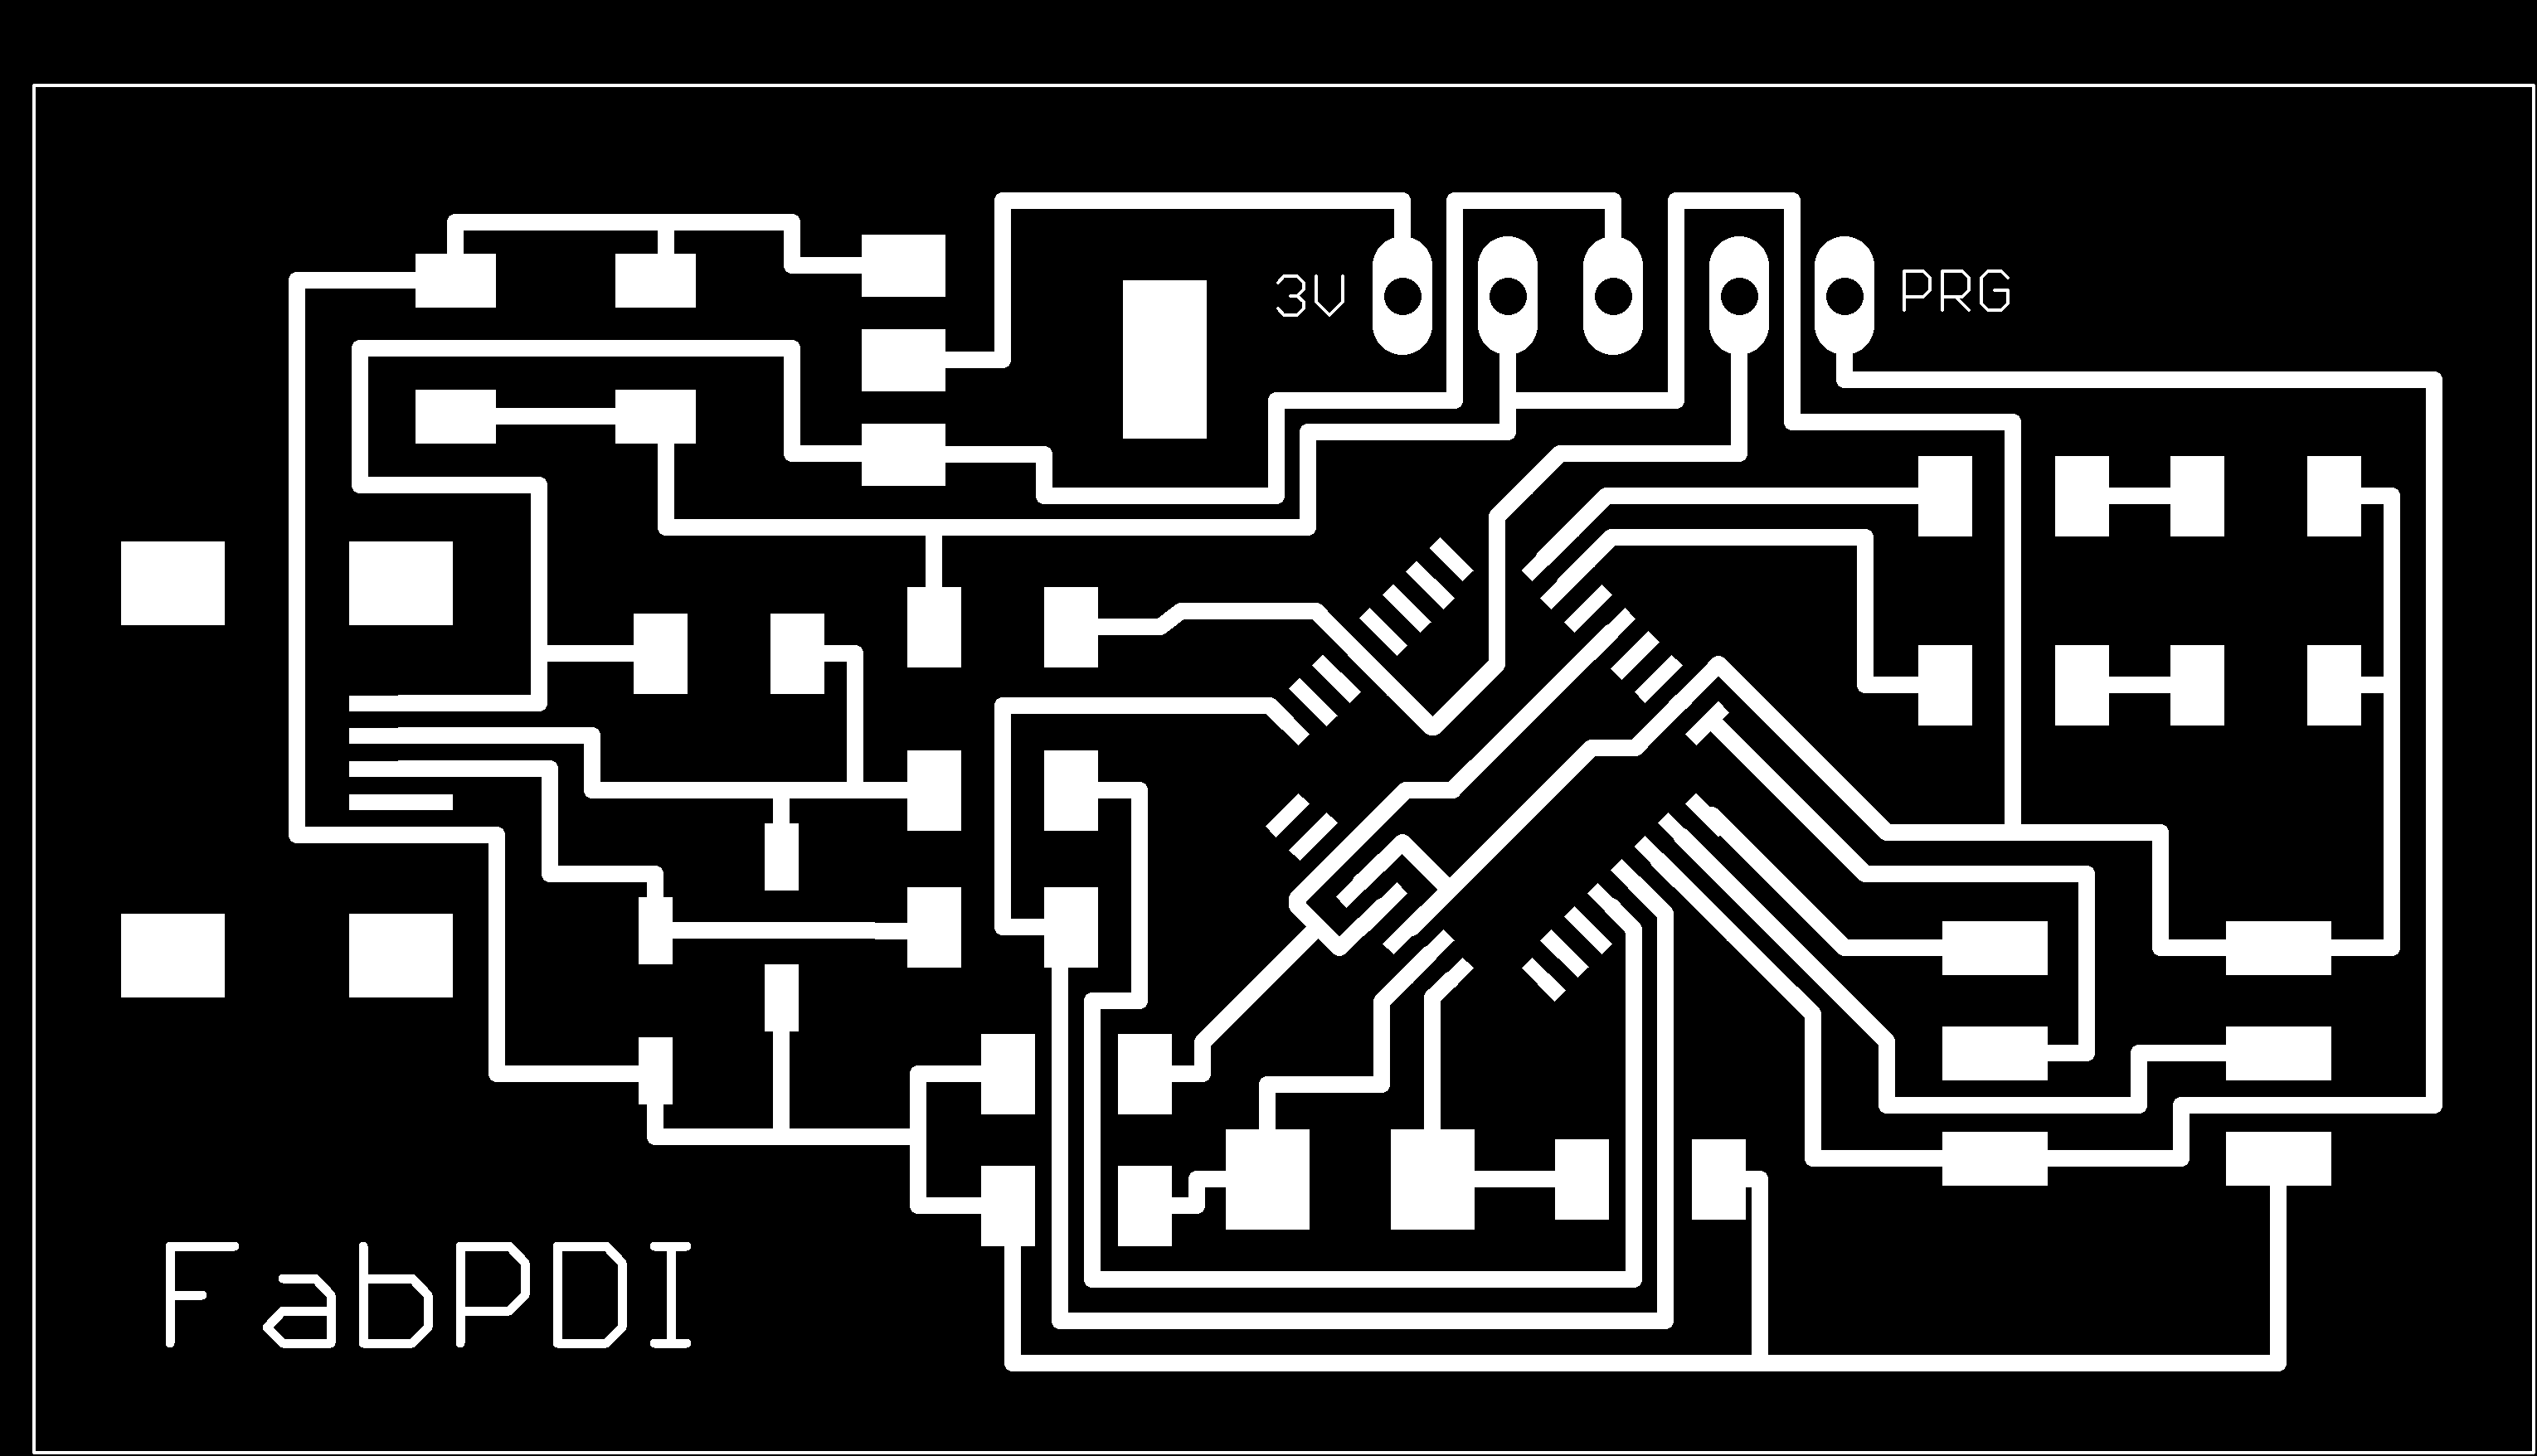
The schematic diagram, component layout, fab modules compatible board outline and pcb traces are shown below.
The schematic is a modified version of Thomas Fischl’s original USBasp circuit. Component values have been modified for Fablab inventory as far as possible and the ATmega8 microcontroller switches completely between 5V and 3.3V. I opted to use a 12 MHz crystal as per Thomas’s original design as I had some available. If you use a different crystal frequency, you will to change the fuse bits and clock value in the source code as well.
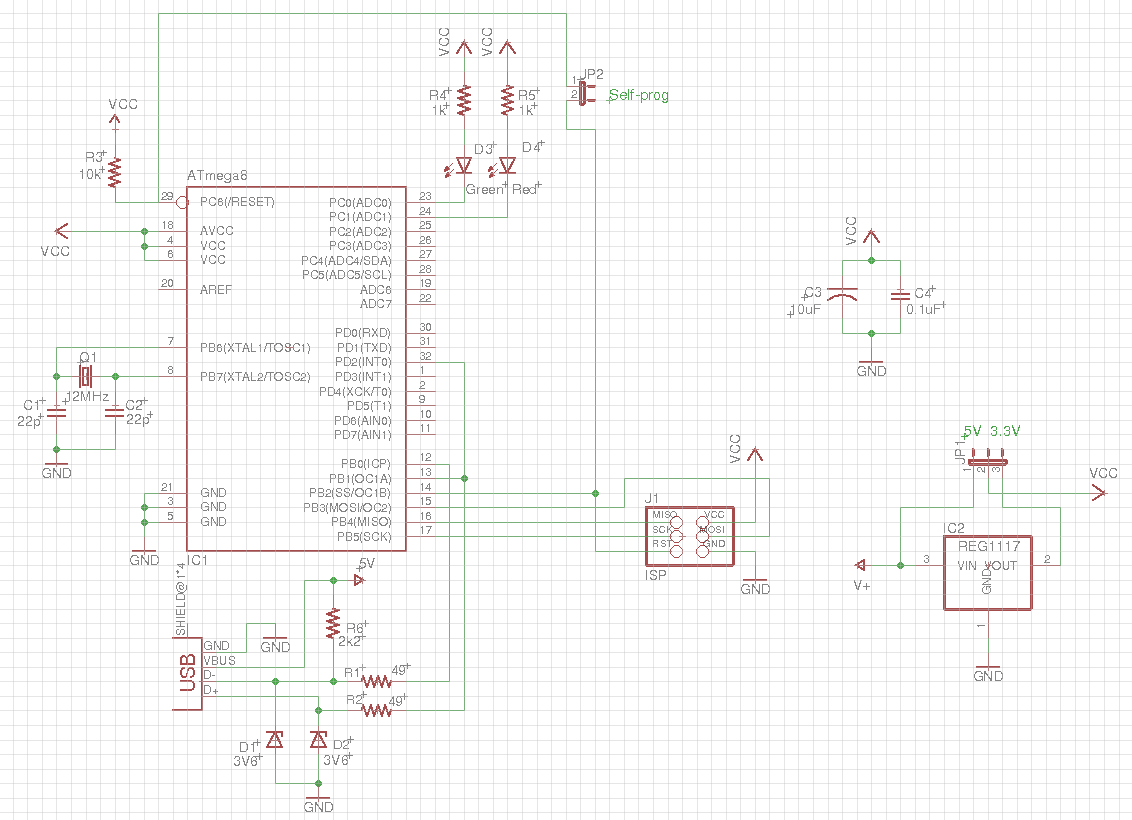
FabPDI-mega8 schematic
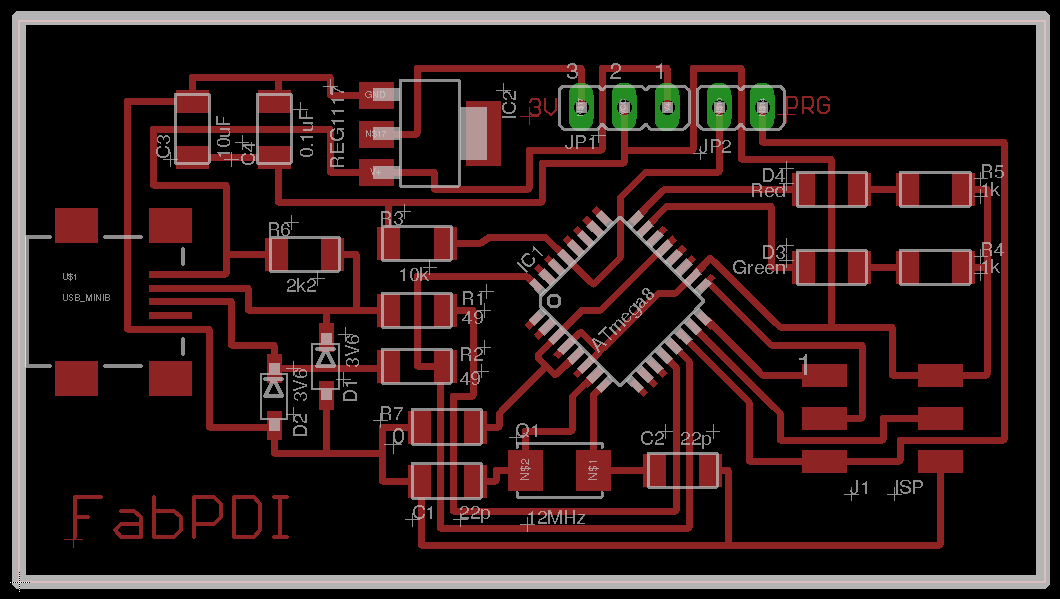
FabPDI-mega8 board layout
Fab modules downloads (1269dpi):
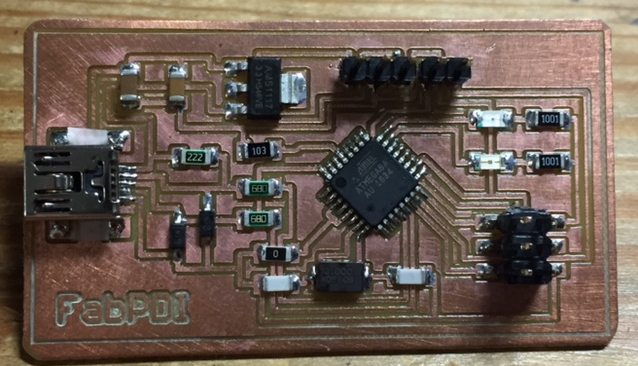
Mill and Stuff the PCB
Component List
| Component | Component |
|---|---|
| 1 x ATmega8A-AU | 1 x Mini-USB |
| 1 x AMS1117-3.3 regulator | 1 x PinHD 2x3 ISP |
| 2 x 3V6 zener | 1 x PinHD 1x2 |
| 1 x LED red | 1 x PinHD 1x3 |
| 1 x LED green | 1 x 12MHz crystal |
| 1 x 10uF capacitor | 1 x 0.1uF capacitor |
| 2 x 22pF capacitor | 1 x 10k ohm R |
| 1 x 2k2 ohm R | 2 x 1k ohm R |
| 2 x 49 ohm R | 1 x 0 ohm R |
Programming the Firmware
The original USBasp firmware has to be modified to support PDI programming. Szulat’s article lists the steps used to modify the firmware. You basically need to do the following:
- Download Thomas Fischl’s USBasp sourcecode (latest version)
- Download the patch file at this link
- Unpack the sourcecode, apply the patch, then compile the file
- Upload it to the FabPDI-mega8 board using another ISP programmer
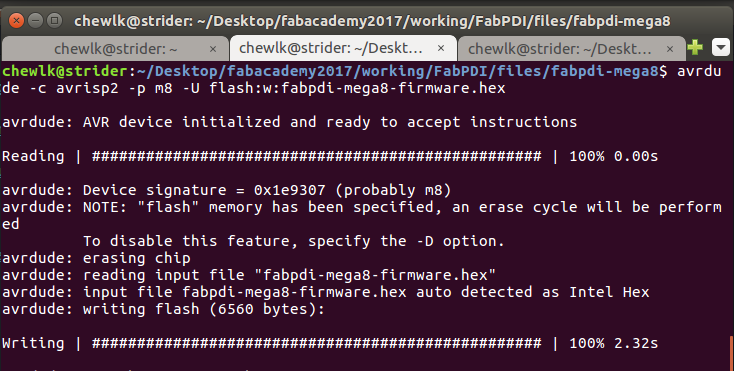
To simplify the process, you can download the modified USBasp firmware for PDI programming here and flash it to the board as follows:
avrdude -c avrisp2 -p m8 -U flash:w:fabpdi-mega8-firmware.hex
avrdude -c avrisp2 -p m8 -U hfuse:w:0xc9:m -U lfuse:w:0xef:m
Note: Remember to short the programming jumper (JP2 in my schematic) when you are flashing the firmware.
Disconnect the ISP programmer, remove the self-programming jumper (JP2) from the FabPDI-mega8 board and reconnect it to your computer. If you have done everything correctly, the board will now identify itself on the PC. In Linux:
lsusb
gives
Bus 008 Device 009: ID 16c0:05dc Van Ooijen Technische Informatica shared ID for use with libusb
If you have gotten this far, congratulations! You are almost there. There is just one more part remaining - patching avrdude to recognize FabPDI-mega8 for PDI programming.
Patching AVRDUDE
I followed the information in Szulat’s and Ketturi’s sites to patch avrdude for PDI programming when I first started.
The instructions from Szulat’s site used avrdude version 5.11 (r1092). After compiling avrdude, I found that that version of avrdude only supported the ATxmega series A and D devices, not the series E devices which we use in Fablab. Since I didn’t have ATxmega A or D devices, I could not verify if the patch worked. I also could not get the patch file to work with a newer release of avrdude, which supports the ATxmega16E5.
Ketturi’s site slightly better. Following instructions at his site, I could compile avrdude under MinGW, but not in Linux. Ketturi provided a precompiled version of avrdude for Windows, but again, this was avrdude version 5.11, which did not support the ATxmega series E devices.
To cut a long story short, after a lot of research and much trial and error, I have successfully managed to compile the latest version of avrdude (version 6.3) for both Windows and Linux environments, which support the ATxmega series E devices like the ATxmega16E5 used in Fab Academy.
The compiled binaries can be download from the links below.
To use the files, unpack the files into a subdirectory or folder. In Windows, open a command prompt window and change to that directory and run it. In Linux, open a terminal, change to the avrdude directory and run it. The FabPDI-mega8 programmer identifies itself as a usbasp device.
Remember - You need to use the modified programming cable for PDI programming and set the voltage selection jumper to 3.3V if you are programming an ATxmega device.
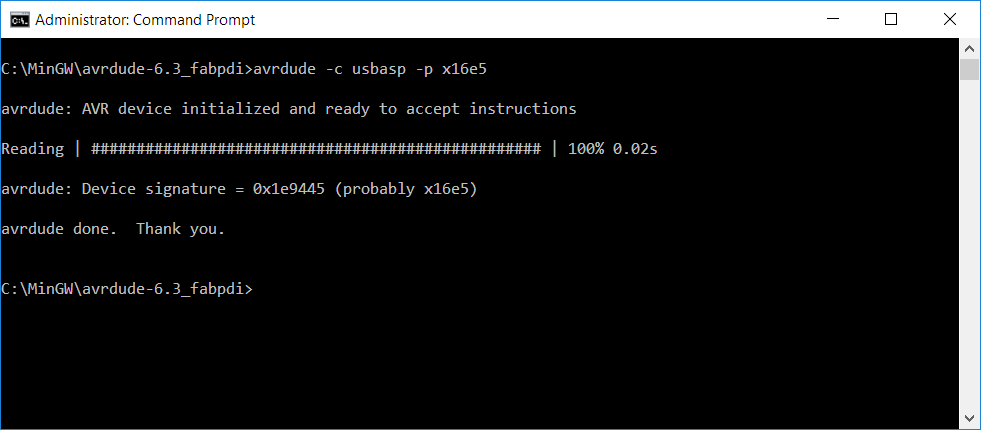
For Windows
Unpack avrdude-6.3_win32.zip. Open a command prompt window, then change to the avrdude subdirectory. Run avrdude:
avrdude -c usbasp -p x16e5
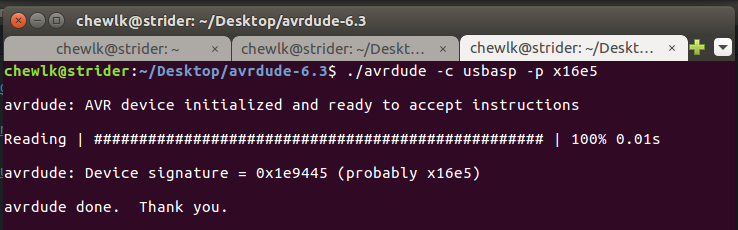
For Linux
Open a terminal window. Unpack avrdude-6.3_linux.tar.gz. Change to the program directory, then run avrdude:
tar xvzf avrdude-6.3_linux.tar.gz
cd avrdude-6.3
avrdude -c usbasp -p x16e5
Congratulations! You have built your very own FabPDI programmer!!
Files
Copyright (c) 2017-Steven Chew
MIT license