<!-- Home, Back using Javascript -->
<div>
<form>
<input type="button" value="Home" onclick="window.location.href='/ep1000digfab/index.html'">
<input type="button" value="Back" onclick="history.back()">
</form>
</div>
<div style="height:2em"></div>
<!-- Remember to change the title of the page -->
# 3D Modelling Techniques
[Presentation: 3D Model Part 2 - Revolve, Sculpt](ep1000_3dmodel2.pdf)
## Recap of Fusion 360
By now, you should be familiar with the following in Fusion 360
[](images/0601_f260interface.jpg)
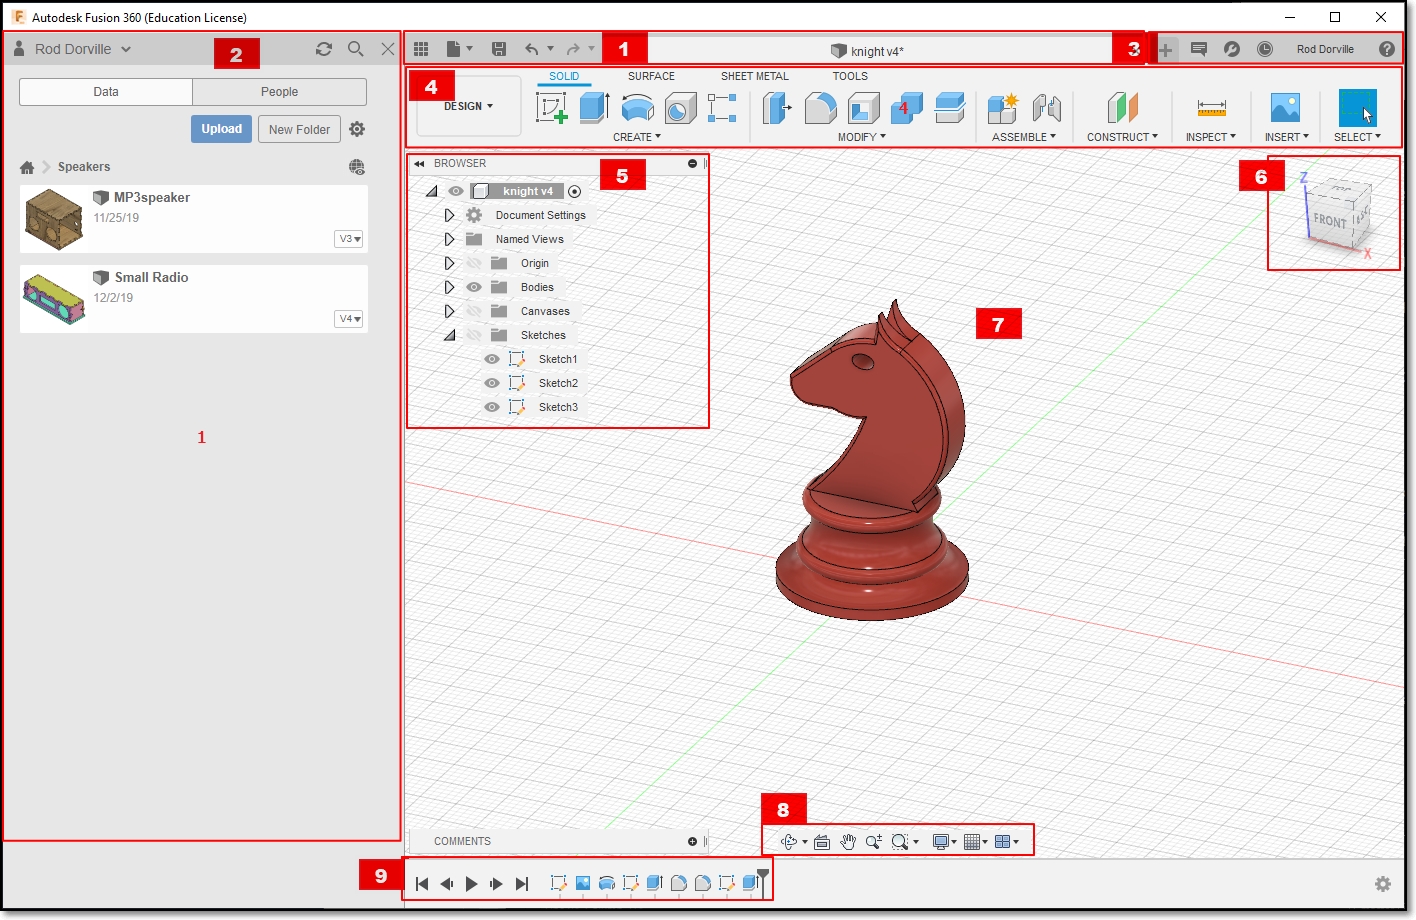
[Fusion 360 interface](https://productdesignonline.com/fusion-360-tutorials/learn-the-fusion-360-user-interface/)
1. Application Bar
2. Data Panel
- Houses all your design files, Allows creation of new preojects.
3. Profile & Help
- Allows settings of Preferences
- Ensure that you have the Z-axis pointing up
- All measurements to be done in mm
4. Toolbar
- Essential command set in each area that you are working on
5. Browser
- Lists objects in your design
- Creation of object: Object - Component - Sketch
- Controls visibility
6. ViewCube
- Home view
- Orientation of object
7. Canvas & Marking menu
8. Navigation Bar & Display Settings
9. Timeline
- Shows order of operations
- Allows editing and manipulation of features
### Workflow
In the creation of any new design, a good workflow plan would be:
1. Sketch, on paper, how your overall design would look like
- decide on profiles
- 2D and 3D layouts
2. Obtain any dimensions that you may need to draw your object accurately
- Measure and estimate
- Obtain a canvas, to map the drawing
3. Create the object
- Create the component, components help to break down the object
- Create sketch of the profile of the object
- From sketch, create a 3D model
4. Inpect and make corrections, adjustments.
### Tips & Tricks
* [Origin, workplanes](https://youtu.be/Nlvy3rPCRwA) Start your sketch from the origin, it anchors the rest of your sketch to a specific point. Start watching at 6:00 (he rambles on a lot!)
* [Constraints](https://youtu.be/_MpL9fPAUG4) - fix your sketchs so that they don't change accidentally
* [5 tips for getting started](https://youtu.be/ezKZIvzVGRM) - gets you started the proper way
## Creating 3D Models
There are 4 basic methods of creating a 3D Model:
### Extrusion
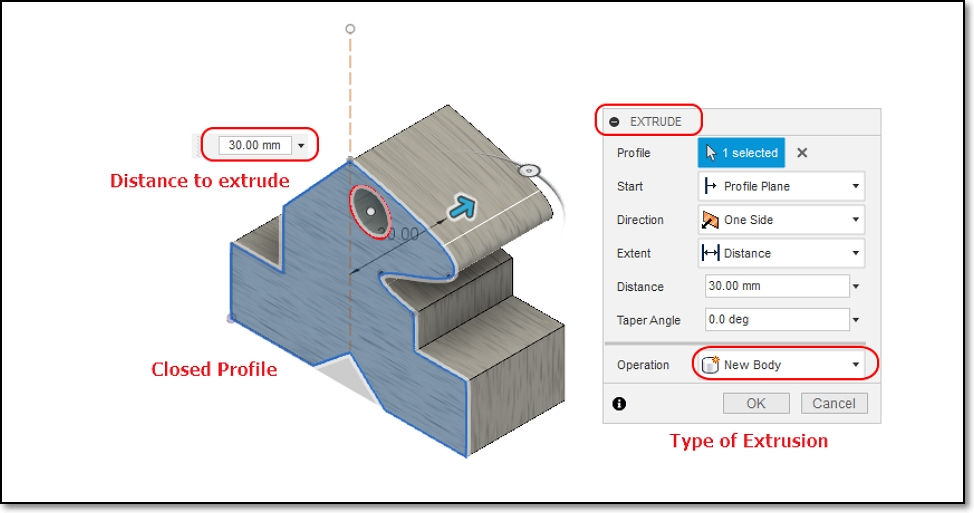
Extrusion is the easiest method of creating a 3D model
- Create a 2D closed profile in one of the planes (e.g. XY)
- Extrude the profile in the third axis (e.g. Z)
3-types of extrusion are provided:
- New Body - creates a new body
- Join - joins extruded body with the existing body
- Cut - uses the extrusion to remove unwanted parts
Can use Extrude or Press-Pull in Fusion 360
- Desktop Makes: [Press Pull vs Extrusion in Fusion 360](https://youtu.be/elQ648fVpwA)
Only good if you have a profile(s) to work with.
### Revolution
[3D Objects using Revolution](worksheets/3D_Objects_using_Revolution.pdf)
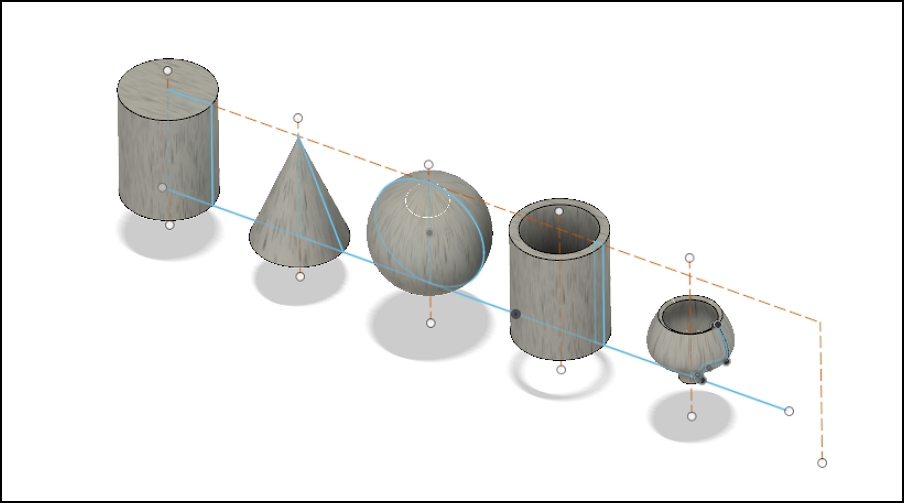
Creates a 3D model based on a profile and an axis to revolve upon.
- Draw a 2D closed profile on one of the planes (e.g. XY)
- Revolve the object about the third axis (e.g. Z)
- Revolution can be
- Partial, based on angle, or limits
- Full 360
- Lars Christensen: [How to Model Anything Round](https://youtu.be/zYMf6qncgwc)
- Good for creating globes, sectors, cylinders, profiles.

- My lecture notes on [Creating Objects using Revolution](3D_Objects_using_Revolution.pdf)
### Lofting
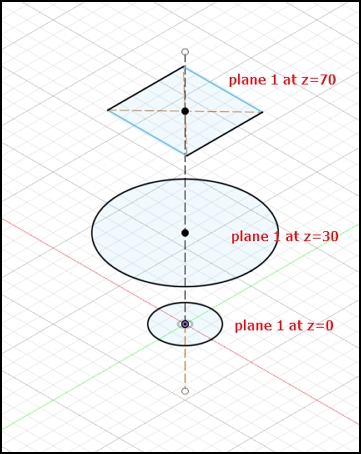
Create closed profiles in the plane outlining your shape
Need to understand - Planes and Offset planes
Use loft to create the 3D object by extrapolating the outlines from one profile to another. The extrapolation can be
- regular, formed from the contours of the profiles
- Mufasa CAD [Fusion 360 How To Loft Object, Point And Rails](https://youtu.be/-Z9ioh2NfwY)
- center-line rail, formed by a line/arc perpendicular to the profiles
- [Example from AutoDesk](https://forums.autodesk.com/t5/fusion-360-design-validate/introduction-to-loft-using-rail-curves-in-fusion/td-p/7296238)
- Good for creating ducts, continous 3D models
|Loft| | |
|:--------:|:----:|:----:|
|[](images/0604a_loft.jpg)|[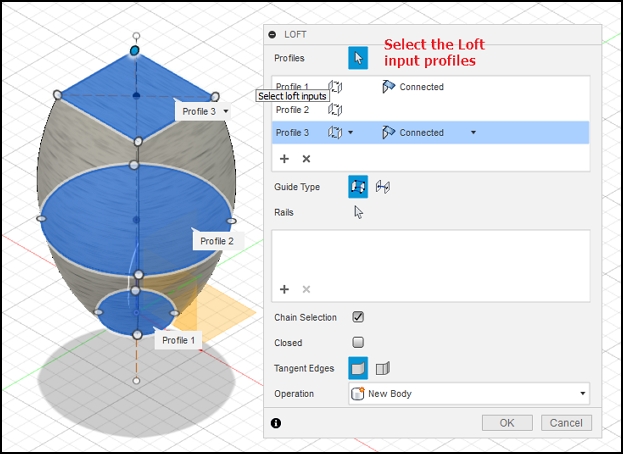](images/0604b_loft.jpg)|[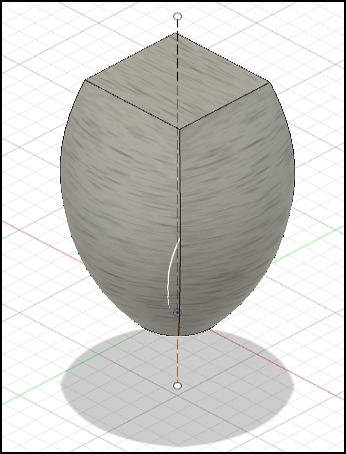](images/0604c_loft.jpg)|
|Create the profiles on different planes|Loft > Select the profiles| Results|
### Sculpting
Creating an object using a basic 3D shape, breaking up the shape into sections and then manipulating the shape to what you want.
Like playing with plastercine, ideal for the creative-minded.
Good tutorials on sculpting
- Product Design Online: [How to Sculpt an Earbud in Fusion 360](https://youtu.be/dbJcnxWHneo)
- Product Design Online: Sculpting for Plastic Parts in Fusion 360
- [Part 1](https://youtu.be/Vrg6h5h_vWs)
- [Part 2](https://youtu.be/FIbmiTTEo_8)
Good for creating objects without fixed profiles or need to be shaped
- Can be very time-consuming
- Has great effects
|Sculpt| |
|:--------:|:----:|
|[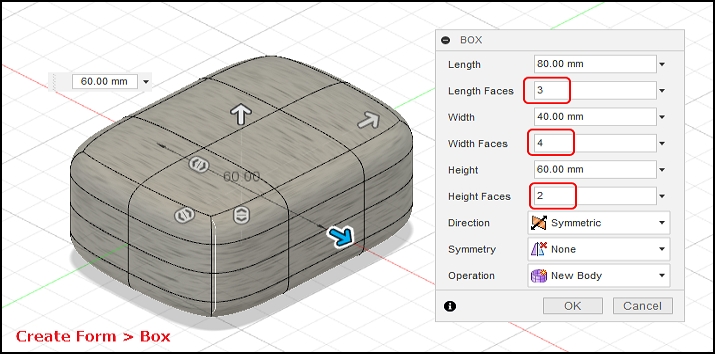](images/0605a_sculpt.jpg)|[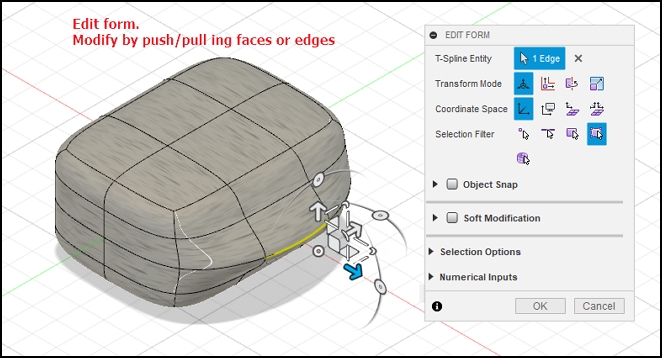](images/0605b_sculpt.jpg)|
<!-- Home, Back using Javascript -->
<div style="height:2em"></div>
<div>
<form>
<input type="button" value="Home" onclick="window.location.href='/ep1000digfab/index.html'">
<input type="button" value="Back" onclick="history.back()">
</form>
</div>
<!--End of markdown area-->